How to maximize email deliverability in just 10 minutes

If you are running a web agency or digital consultancy, you probably use multiple services that send white-label reports, notifications and other emails to your clients. Using your own email address with these services is important for white-labelling third party emails. But emails from your account sent via a third party have low email deliverability rate since they are often marked as spam.
In this How To, we’ll walk you through the process of testing and improving your email deliverability. In other words, emails from third party services will not end up in the spam folder.
Before you start
To improve your email deliverability, you need a few things on hand before you begin.
- Email account details. Most third-party services use the SMTP details of your email service provider to send messages from your account. In the example below we’ll use and Gmail account and the SMTP details provided by Google. If you’re using another email provider, consult their documentation as appropriate.
- Third-party email client. You’ll use this to send test emails. We’ll be using the Watchful website report builder as our client to send emails. But you can use any software that allows you to insert your SMTP details and send an email. For example, if you are managing a WordPress website, use the SMTP Mailer plugin to configure SMTP and send test messages.
- DNS record editor. To improve your email deliverability, changes at the DNS level are common. Typically, your DNS record editor or zone file editor is provided by your domain registrar, cPanel, or DNS proxy service. In the example below we’ll use the DNS proxy Cloudflare to edit our DNS records. This has the advantage of near-instant propagation of the changes to your DNS records.
Step 1 — Configure your SMTP client
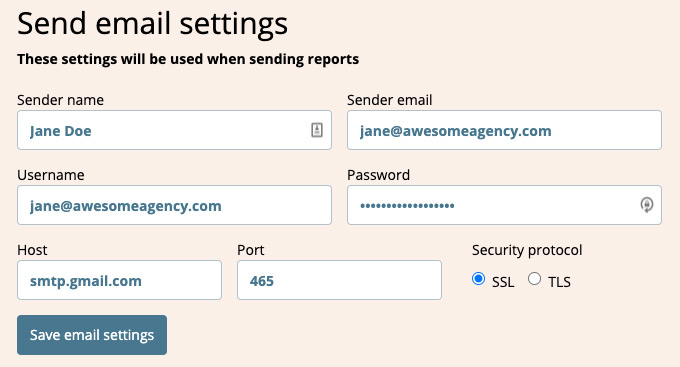
Using the SMTP details noted above, configure your email client. If you are using the Watchful report builder as your client, you’ll add your SMTP details in the settings area as shown below.
Step 2 — testing email deliverability
The most important part of improving email deliverability is the ability to measure deliverability. A popular tool for measuring the “spammyness” of your test email is mail-tester.com.
This service works by creating a temporary email account to which you can send test messages. These messages receive scores indicating their spammyness in real time. Here is what the homepage looks like:
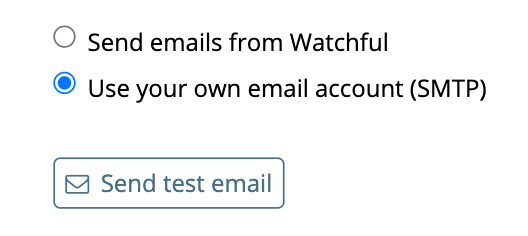
Simply copy the email from mail-tester.com, paste it into your email client and send a test message. Here is where you send test message from the Watchful report builder if you are using that as your email client.
Once you’ve sent the test message, return to mail-tester.com and click the Check your score button. Be patient as it can take up to a few minutes for emails to be received. If you are using a Gmail account, be sure that the Less secure apps setting is enabled for the account:
In our first test, you can see that the deliverability score was very low. This message would definitely be flagged as spam by most email services. Keep in mind that eight or higher is a good target score.
There are many factors that affect email deliverability. But the most common for web agencies are spammy content with suspicious or frequent links and technical issues with your DNS records. Thankfully, mail-tester.com will give you a lot of detail on how to fix these issues.
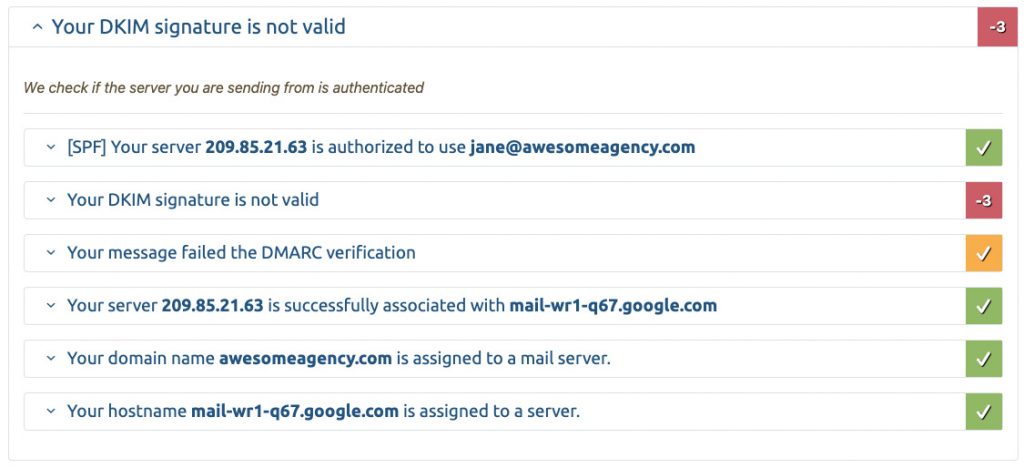
Below your deliverability score you’ll see a breakdown of the score by category. Look for categories with negative numbers and click the category name for details.
As you can see in this example, an invalid DKIM signature results in a 3/10 drop in the deliverability score.

Step 3 — Adding a DKIM signature to your DNS
To fix the DKIM issue we discovered above, we turn to our email provider, Google. In this case, we have a 2-step solution: (i) generate a DKIM signature for the domain and (ii) add this signature to our DNS records.
Follow these instructions to generate a unique DKIM signature for Gmail. Once you have created the signature and copied it to your clipboard, open your DNS editor and add it to your zone file as a TXT record.
Here is what this looks like using the DNS editor at Cloudflare.
If your using Cloudflare, you test the effectiveness of adding the DKIM signature immediately by sending another test message to the same mail-tester.com address you used in Step 2. Once the message is sent, reload the same page at mail-tester.com to see the updated results.
In our tests, the results were immediate and our score jumped from 2.8 to 6.8!
Note: If you are not using Cloudflare as your DNS editor, you may need to wait 24-48 hours for the DNS change to propagate and then send another test email.
Step 4 — Adding a SPF record to your DNS
Another common problem affecting deliverability is the lack of an SPF record. Like DKIM, SPF records are added to you DNS zone file. However, SPF records are not unique for each domain. Here is the SPF record for Gmail:
v=spf1 include:_spf.google.com ~all
And here is what it looks like in the DNS editor in Cloudflare with two additional SPF records (one for each email service provider):
Step 5 — Final test of email deliverability
Once all the major items identified by mail-tester.com have been addressed, repeat the analysis.
In our case, adding DKIM and SPF to the DNS records improved the deliverability score from 2.8/10 all the way up to 8.8/10. Mission accomplished!
Remember, we used the DNS proxy Cloudflare to make DNS changes. Since we didn’t have to wait for propagation of the records, the entire process took only 10 minutes as you can see below.

As a final test, now send your test email to a real email address to make sure it arrives at your inbox and not in your spam folder.


0 Comments