How to build your own managed WordPress hosting for $2 per month

Managed website services have exploded across the hosting industry in the last decade. And while they are clearly suitable for many sites, managed WordPress hosting has a number of potential drawbacks that agencies should carefully consider.
If managed WordPress hosting is not a good fit for you, or simply outside your budget, you’re in luck. In this article, we will walk you through how to build an affordable managed WordPress site using your existing host.
When complete, your websites will have:
- Automatic backups
- Automatic software updates
- Hardened security
- Improved page speed
- Uptime monitoring
And while managed hosting can easily be 5 to 10-fold higher than traditional hosting, all of these features can be added to your existing host for for less than $2 per month.
Step 1 – Sign up for Watchful
Start by signing up for Watchful Premium ($1.83 /month /site). For most sites, no other software or service costs are required.
Step 2 – Install the Watchful plugin and add sites to your dashboard
Once your purchase is complete, install the Watchful plugin on your sites. Follow the post-install instructions to add the sites to your Watchful dashboard. Full installation details are available in our Knowledge Base.
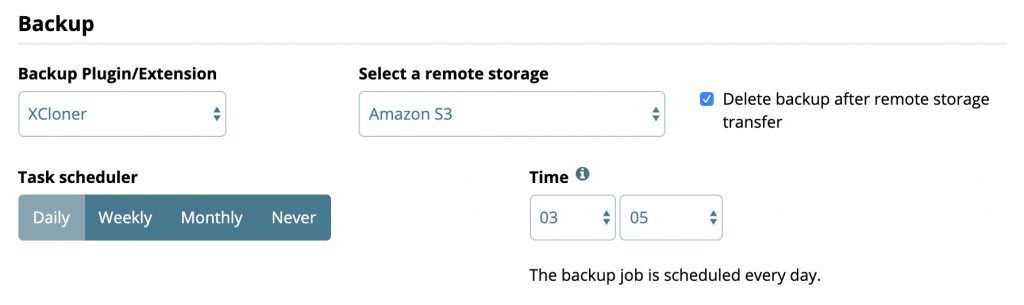
Step 3 – Configure automatic backups & remote backup storage
Automatic backups are a key component to any managed WordPress solution. With Watchful and our free plugin XCloner, you can easily schedule daily, weekly or monthly backups. You can even store your backups safely offsite with a free cloud storage service such as Dropbox, Google Drive or Microsoft OneDrive. This improves data security compared to your host being solely responsible for backups.
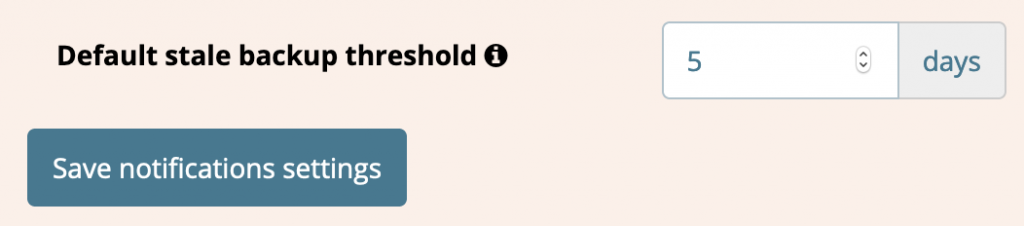
While setting up your site backups in Watchful, you’ll notice that you will be encouraged to indicate the age at which your most recent backup is considered outdated or stale. Watchful uses this status in two ways.
First, a stale backup notification is a warning that either a backup has failed, or that there is a misconfiguration of your backup settings. Those are things you’ll want to address right away.
The second use of the stale backup status is related to controlling automatic backup schedules as we will discuss in Step 5.
Stale Backup setting in Watchful. Step 4 – Schedule automatic updates
Automatic updates are a popular feature with managed WordPress hosting vendors. However, they typically don’t allow you to include or exclude the updates you want to be performed. As shown above, a majority of WordPress professionals are selective about what updates are applied automatically.
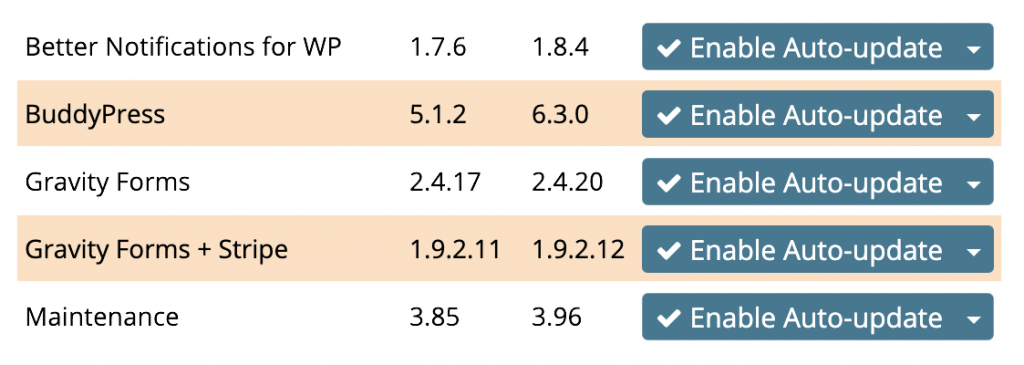
When you use Watchful Premium, you can choose which updates to automatically apply on a per-website basis. As an example, Watchful gives you the flexibility to automatically update Yoast (for example) on all your sites or just a few. And if you have dozens of sites, you can enable automatic updates in bulk with just a few clicks.
Our Knowledge Base has full details on enabling automatic updates.
Step 5 – Create automatic update rules/schedules
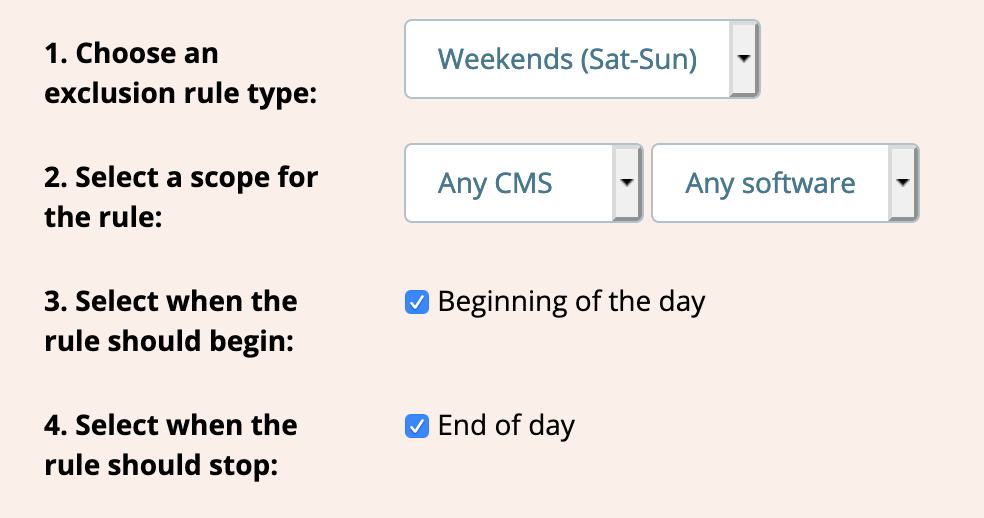
Neither managed WordPress hosting vendors nor the WordPress auto-update system offer flexible control over when automatic updates occur. Watchful Premium allows you to build a set of rules that determine if and when automatic updates occur. Our Update Scheduler helps agencies build healthier work habits by making automatic updates more predictable and reliable.
For example, you can exclude evenings and weekends so that automatic updates only occur during office hours. Similarly, you can delay automatic updates if your backups are stale (as described in Step 3).
Step 6 – Disable WordPress Auto Updates
Since WordPress itself includes auto-updates for both core and plugins, you’ll want to disable them to get the full benefit of Watchful’s automatic update scheduler. You can easily disable WordPress automatic updates by a variety of methods.
Step 7 – Harden security & improve performance
Watchful includes many tools to help you detect intruders and harden your website from attacks. However, we also strongly recommend using a DNS-level security and performance tool such as Cloudflare.
The free plan at Cloudflare boosts the security of your site as many security issues are blocked before they ever reach your website.
Additionally, Cloudflare serves all your site data on their content delivery network and can even minify javascript and CSS. All of these can improve page load times dramatically. Additionally, the recent release of Automatic Platform Optimization means that WordPress sites are turbocharged when they use Cloudflare.
Prefer traditional managed WordPress hosting?
If you have the budget for traditional managed WordPress hosting, you may want to first consider these potential downsides. Then have a look at this review of the best managed solutions.


0 Comments