Three ways to quickly manage automatic updates across many sites with Watchful
Automatic software updates can speed up website maintenance dramatically. So, managing automatic updates in bulk — enabling and disabling them across many websites at once — is a critical tool for any digital agency.
For instance, you may discover that a WordPress plugin breaks your sites or installs a backdoor. In this example, the ability to quickly disable updates for that plugin across your entire portfolio of sites is very important.
There are three ways to manage automatic updates in Watchful. In this post we’ll describe each of them in detail and show you visually exactly what to do.
Use the Site Updater
The Site Updater is one of the most popular tools in Watchful. It is a great way to review and apply pending software updates.
Follow these steps to manage automatic updates from the Site Updater:
- Select a site from the dashboard and click the site name to open the
Site Drawer. - Click the
Updaterbutton to view the list of pending updates.- If the software of interest is not shown, use one of the other methods below.
- Locate the software of interest and click the drop-down arrow on the right-side of the
Enable Auto-updatebutton. - Click the
Enable Auto-update on all sitesbutton.
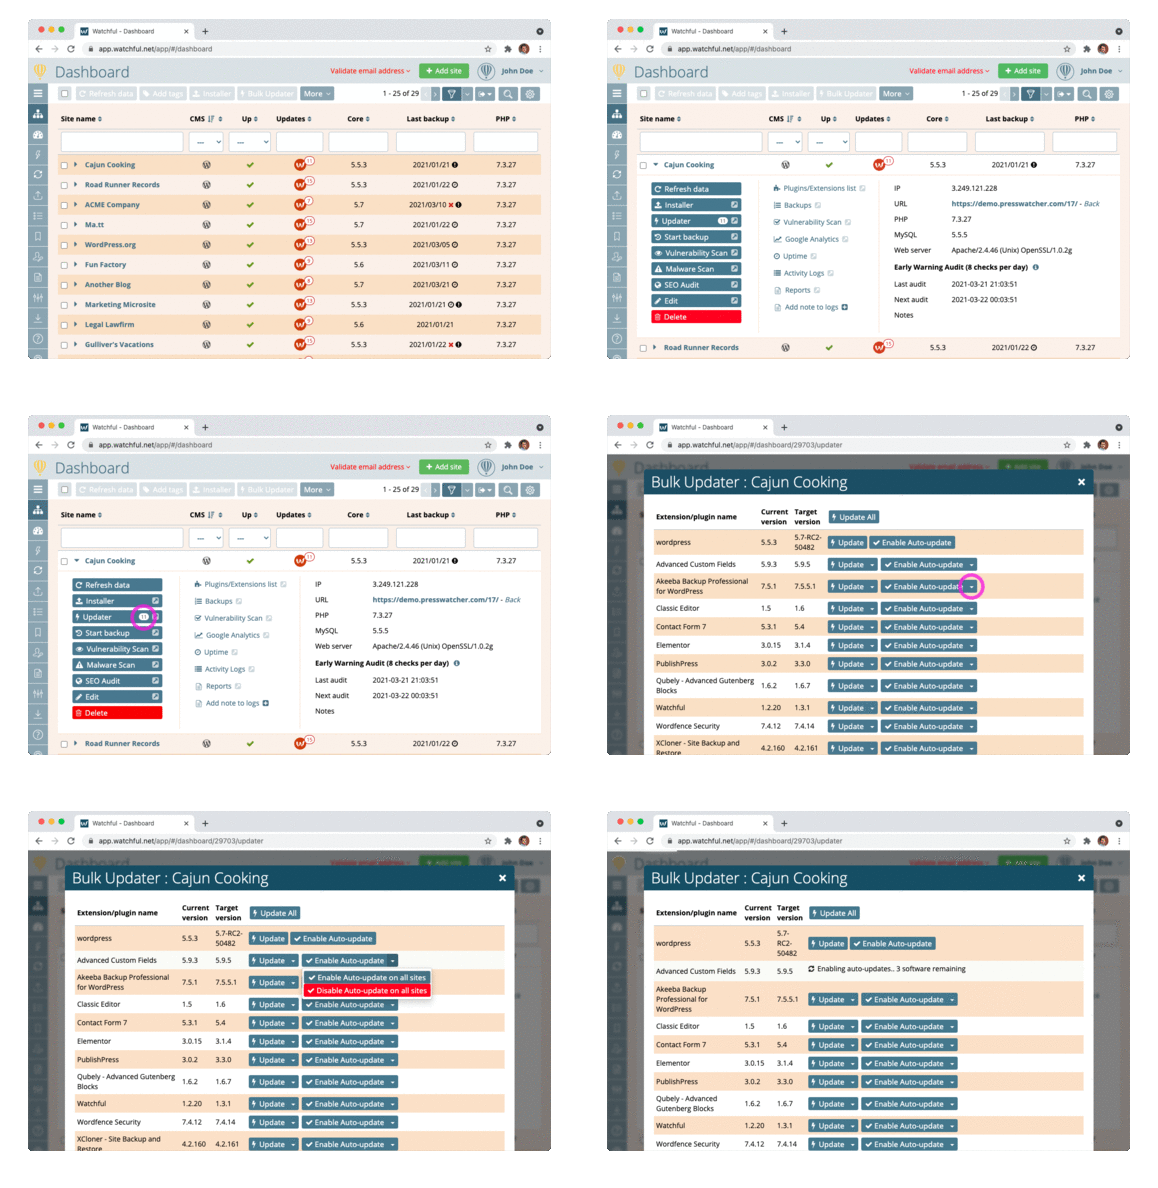
Site Updater.Use the Plugins/Extension List
Watchful monitors the plugins and extensions installed on your website. Consequently, they can all be listed in the site drawer even if no update is pending.
Follow these steps to manage automatic updates from the Plugins/Extension List:
- Select a site from the dashboard and click the site name to open the
Site Drawer. - Click the
Plugin/Extension listlink to view all of the software installed on your site. - Locate the software of interest and click the drop-down arrow on the right-side of the
Enable Auto-updatebutton. - Click the
Enable Auto-update on all sitesbutton.
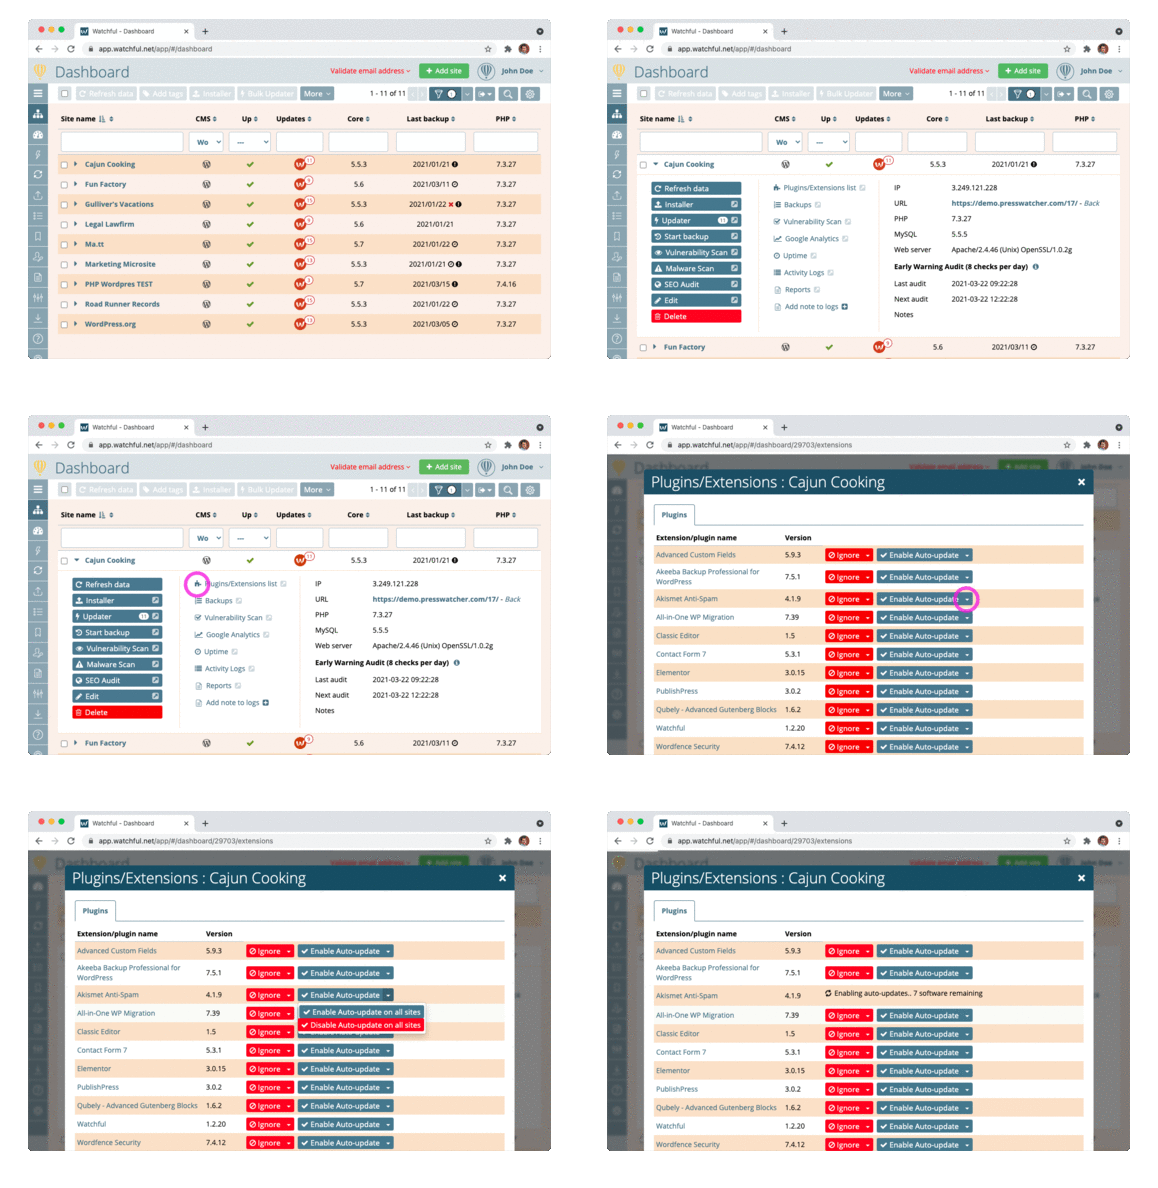
Plugin/Extension List.Use the Auto Update Manager
The Auto Update Manager is a central location for managing all aspects of Watchful’s automatic updates. This includes rules for scheduling automatic updates and a list of existing software that are auto-updating.
Follow these steps to manage automatic updates from the Auto Update Manager:
- From the dashboard, select the
Auto Updaterfrom the side menu on the left. - Click the
Add Softwarebutton at the bottom-right. - Use the bar to filter the list and locate the software of interest. Select the software on the left and click the
Savebutton. - When the auto-updates are added, click the
Savebutton to return to the Auto Update manager.
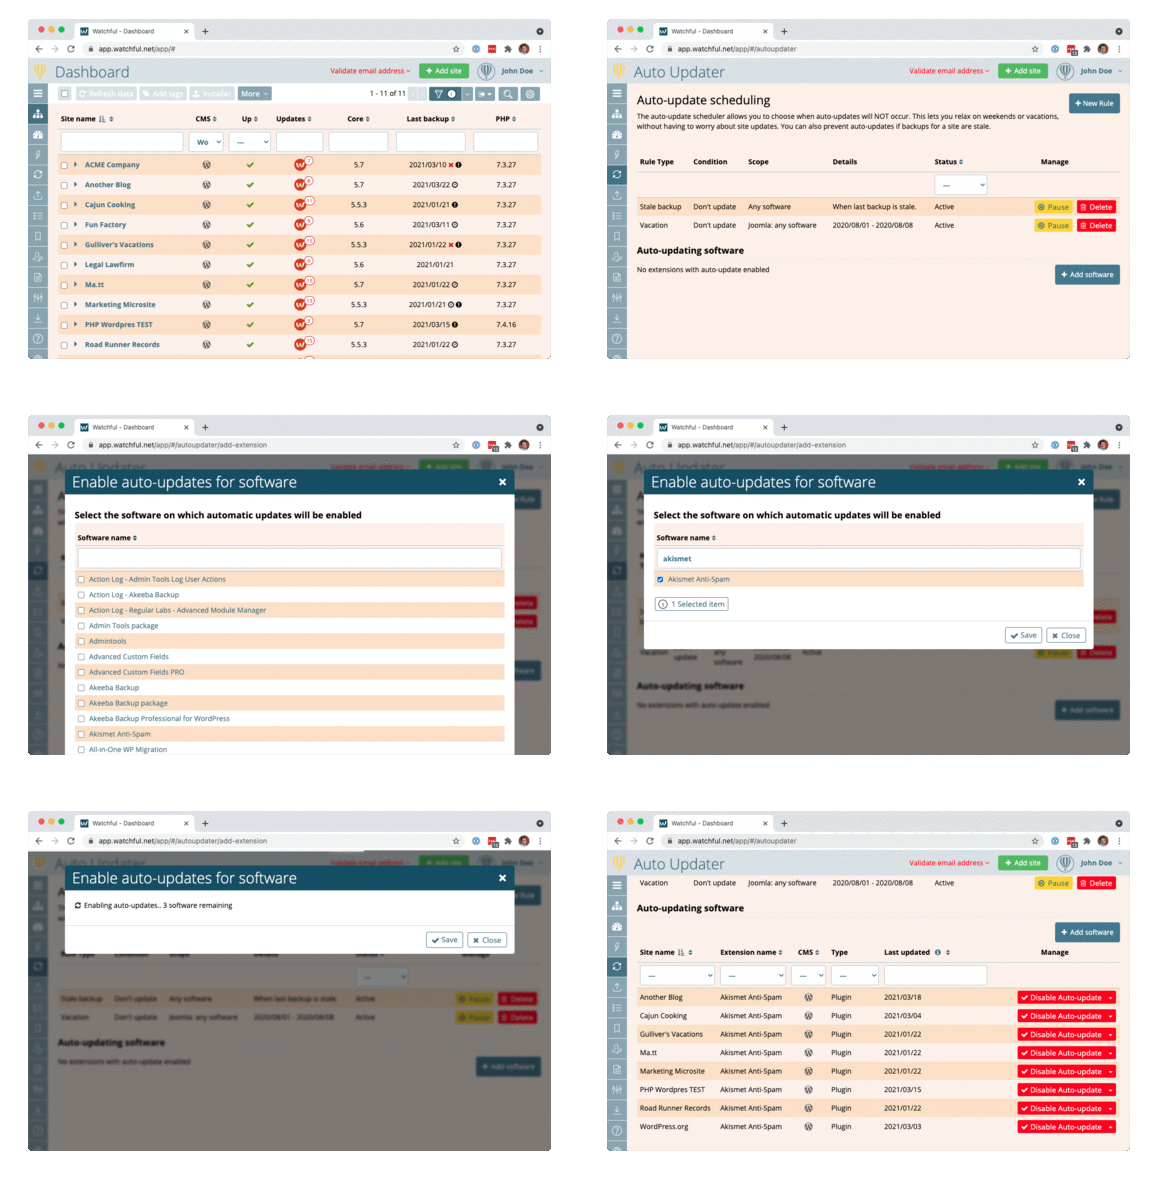
Auto Update Manager.Improve efficiency by adding and removing automatic updates on many sites at once
Use the techniques above to enable automatic updates in bulk. Removing automatic updates is just as easy with the Disable Auto-updates on all sites buttons as shown above.
Together, managing automatic updates in bulk can save a lot of time and frustration for anyone performing website maintenance on multiple sites.


0 Comments